
Each Tough Mudder course is 10-12 miles long and contains 20-25 obstacles. Some of them are easy to master, while others will push you to your limit!
The obstacles which you will encounter at Tough Mudder will be announced only a few days before the start. Nonetheless, there are a few classics which you can find at basically every event.
Prepare yourself mentally for the toughest obstacles, and nothing will shock you when you tackle Tough Mudder. Well, except the electroshocks of Electric Eel and Electroshock Therapy, of course 😉
Tough Mudder Obstacles – Overview
Arctic Enema 2.0
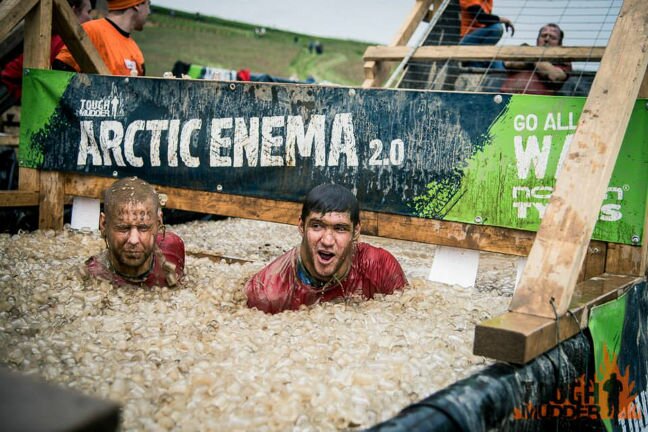
The Arctic Enema 2.0 wasn’t made for pussies! 😀
Arctic Enema 1.0 was pretty tough, but the new version is even tougher!
You have to slide into a pool filled with iced water, and then if that wasn’t enough, dive underneath a wooden beam.
Even though this obstacle takes only a few seconds to complete, you’ll think your lungs are about to burst!
Unsurprisingly, you can see the panic in many Mudders’ eyes when they climb out of Arctic Enema 2.0.
Tips for the obstacle Arctic Enema 2.0
Arctic Enema 2.0 is the main reason why you should toughen your body while preparing for Tough Mudder.
Don’t enter the iced water too early, as there can be “traffic jams” at the wooden beam and at the exit.
In Arctic Enema 2.0, you’ll regret every second you’ve wasted!
At this point, we can’t stress enough how important special running gear and special running shoes are for Tough Mudder.
Wet, slow drying clothes in a cool environment increase the risk of hypothermia and can be a serious health risk.
By the way, be careful with your GoPro!
Hold the GoPro firmly in your hands or ask another Mudder whether he is so kind as to take care of it for a few seconds.
The head mount is great but in that case the risk of losing your GoPro is too high! Believe us – we are the living proof 😀
You should also put a note with your contact data on the inside of your GoPro case, just in case of a mishap!
Last but not least, here’s a tip for the really tough guys
If you’re looking for the ultimate kick, sign up for the first starting group!
At this time the outside temperatures are usually lower, and apart from this the Arctic Enema 2.0 is still virgin.
Imagine – although the volunteers refill the ice constantly, thousands of Mudders cause a lot of heat!
First come, first serve! 😀
| back to overview |
Balls to the Wall
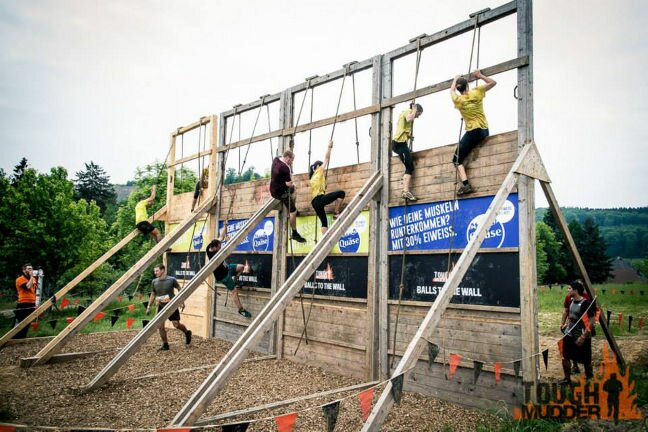
At Balls of the Wall you have to climb up a 15-foot-high wall with the help of a rope. And… what a surprise, after that you also have to climb down on the other side again 😉
Evey few feet there’s a wooden beam to make your life just a little easier. They don’t only support your work with the legs and arms, they also allow you to rest for a second (or maybe two).
If you are not afraid of heights, mastering Balls to the Wall should’t be a big deal!
Tips for the obstacle Balls to the Wall
The biggest challenge at Balls to the Wall is to keep a firm grip, despite the slippery rope.
Work your way up with rhythmic movements, and focus on not losing balance and dropping to the side on the rope.
Anyway, falling down from the top isn’t the best idea, so be careful!
| back to overview |
Birth Canal
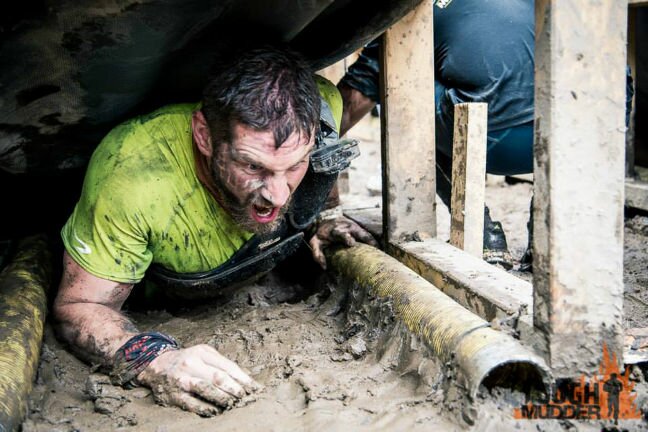
The name “Birth Canal” is well chosen, because it’s really tight and slick, and you don’t look very pretty when you’ve pushed yourself out on the other side.
You have to crawl through the muddy ground while a heavy liner filled with water is hanging above you, pushing you down.
It’s neither one of the hardest nor one of the most fun obstacles, but anyway – Tough Mudder isn’t always a bowl of cherries!
If you have fear of getting not enough air to breathe, don’t worry! Until now, there were no stillbirths recorded, and all the Mudders survived the Birth Canal – for the second time (at least) 😉
Tips for the obstacle Birth Canal
Move as close as possible to the ground, but without unnecessary dragging!
Maybe not the fastest, but presumably the most comfortable way is to do most of the work with your arms.
Go into the plank position and pull yourself forwards. Repeat this again and again, until you see the light of day.
With this tactic you can avoid grazes and keep control!
If you were no dead loss in physics in school, it won’t surprise you that the center of gravity of the liner’s gravity (and therefore the most weight) is in the middle of the lane.
So be smart and try to crawl along the side for saving power!
Just in case of suffering a panic attack, turn your head sideways. So you can breathe easily and calm slowly down.
| back to overview |
Cage Crawl
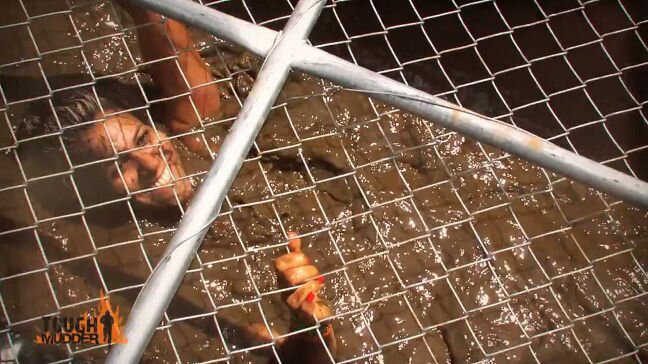
At Cage Crawl, you have to make your way through a ditch filled with dirty, cold water by dragging yourself backwards along a fence above your head.
Since that fence is only a few inches over the water, you’re always in danger of swallowing some water.
If you don’t like being in water or if you’re claustrophobic, this obstacle can make you panic easily.
Tips for the obstacle Cage Crawl
Strength lies in calmness! Tackle this obstacle slowly and with care.
If you go too fast, you’ll automatically swirl up the water, which will then land in your face. That increases your risk of panicking and moving even more erratically – a viscous cycle!
Always try to stay calm and keep your head and body as high as possible.
Afterwards, you’ll be soaked. Therefore, we recommend apparel and shoes well suited for Tough Mudder. They’ll help you to quickly dry off.
| back to overview |
Cry Baby
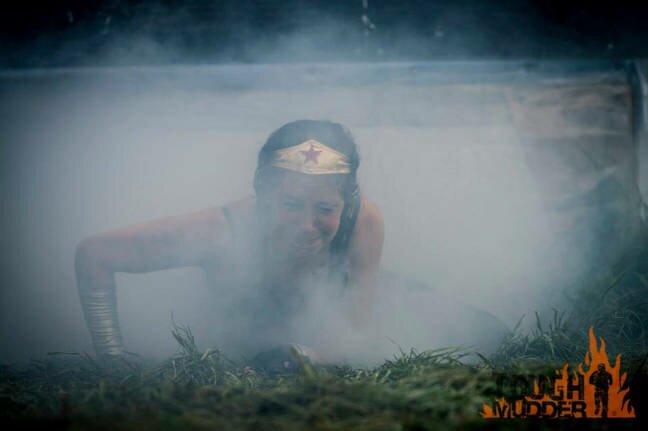
When Tough Mudder launched the obstacle Cry Baby, it sounded really scary and dangerous!
But in fact, Cry Baby isn’t harder than the obstacles with electroshocks, for example. Some Mudders even like it 🙂
You have to crawl through a zone in which a peppermint mixture is emitted constantly. You can hardly see anything, so you have no idea how much distance is left.
In addition to that, your breathing is also limited! That’s the reason why some Mudders become a bit panic.
The feeling is very special, but Tough Mudder’s comparison with tear gas after presenting the new obstacle, was obviously an overstatement.
Believe us – there is no reason for suffering a panic attack!
Easy to say, isn’t it? 😉
Tips for the obstacle Cry Baby
First of all, make sure to leave enough room between the Mudder in front of you and yourself.
You can’t see him or her and a traffic jam in the darkness with limited respiratory ways isn’t that much fun!
Close your eyes and then crawl as far as possible, and breathe as little as necessary.
The more time you need, the higher is the chance of suffering a panic attack! After a few seconds it’s all over, so keep calm!
After coming out and reorientating yourself, you’ll recognize how delightfully free your respiratory ways are – just like after a cold bath.
So don’t be panic, and enjoy the full load of peppermint!
| back to overview |
Dead Ringer
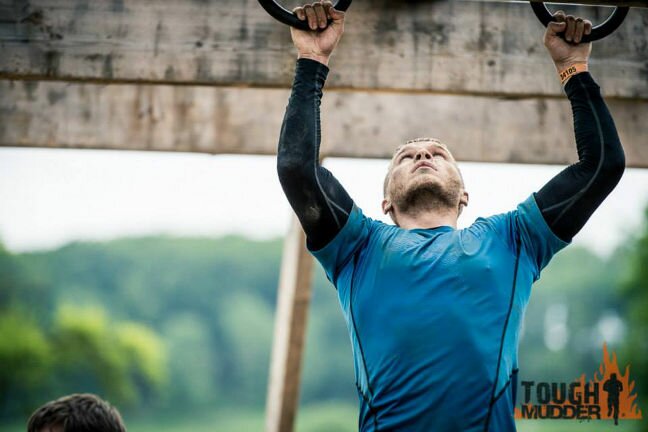
Based on the level of difficulty, Dead Ringer is one of the highlights of the Tough Mudder obstacles!
Here you need both, strength and coordination!
Equipped with two rings in your hands, you have to climb along a series of (sometimes ascending and descending) pegs sideways.
The pegs are really slippery, and you have almost no grip – one wrong movement and you’re falling down!
Of course, if you fell into the water after missing a peg, it would be more fun, but they obviously wanted to preserve the volunteers from diving after the rings all the time, so this obstacle comes without water.
Tips for the obstacle Dead Ringer
No question, first of all you should hold on to the rings firmly. Otherwise, you’re falling down after a few seconds!
For mastering the Dead Ringer, you have to choose between two techniques.
Both of them are based on rhythmical movements, but the first one relies more on strength, whereas the second one relies more on coordination.
Tactic 1: Rely on your strength
If you decide om this technique (like most of the Mudders), you take every single peg step by step, ideally in a medium pace and very rhythmic.
You don’t swing much and your movements are rather mechanical.
On one side, your risk of falling because of missing a peg is reduced significantly this way.
But on the other side, taking every single peg means hanging for a long time, which means you need a lot of power!
No matter how much power you have, you should always keep your arms slightly bent. This way you can climb much more economically and save a lot of energy.
Tactic 2: Rely on your coordination
If you’ve got advanced coordination skills, this technique seems to be great for you!
The idea behind this technique is to take as few pegs as possible, so you can finish the Dead Ringer in a very fast and economic way.
For this you have to make oscillating movements with your whole body so that you win at least two pegs with every ring.
Your arms are not as much bent as in the technique before, because you almost need your whole arm length to reach the second next peg.
This technique definitely works, but it’s very risky. As the pegs are quite slippery it’s not only a matter of ability, you also need a bit of luck.
So if your strength and coordination skills are about equally developed, and you want to be on the safe side, then you should choose the first technique!
| back to overview |
Electric Eel
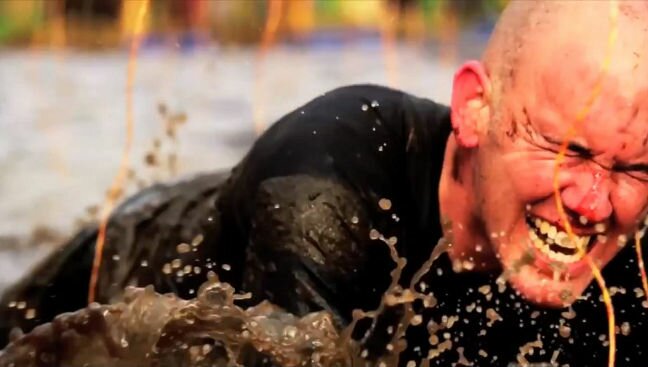
In our opinion, Electric Eel is by far the toughest obstacle of Tough Mudder!
Sometimes, we have nightmares about this obstacle (okay, that might be a little exeggerated). It might be the only obstacle that leaves you more frightened afterwards than before though!
A wooden fixture hangs over the watery ground, the top just being as high as your rear end. From the top there are plenty of electric wires dangling down.
As soon as you touch a wire, it will shock your entire body. The water will do the rest!
At this obstacle, you can hear people (especially male Mudders) scream every other second. Don’t worry though: As long as you don’t have a pacemaker, the electroshocks won’t kill you 😉
You might pass out for an instant though. Highscore within our Mudder Guide Team: 4 knockouts at a single attempt.
Tips for the obstacle Electric Eel
Switch off your mind and attack the obstacle immediately. The longer you wait at the obstacle and hear other Mudders scream, the more you’ll cramp!
Get it over with as fast as you can. Protecting your head as much as possible!
The slower you crawl, the harder the electroshocks will hit you and the more likely you’ll start to panic!
| back to overview |
Electroshock Therapy

Shortly before you can finally receive your legion headband and the well-deserved beer, you have to face Electroshock Therapy. That means you have to run through hanging electric wires!
While this obstacle is far from being a pleasure, in our opinion it’s not nearly as bad as Electric Eel.
Firstly, you can make it through the obstacle quickly. Secondly, the electroshocks aren’t amplified by the water, as in Electric Eel.
In the meanwhile we have done this obstacle a lot of times, and to be honest, it’s a bit like in the lottery!
Sometimes you ask yourself after mastering the Electroshock Therapy, whether you have received any electroshock…
…but we also made really tough experiences where we received a really hard one!
One of them caused a big laceration at Michael’s arm and now he even has a little scar on his right biceps!
Just remember – Tough Mudder isn’t a walk in the park! 😀
Tips for the obstacle Electroshock Therapy
If you need to think of something during that obstacle, think of the fact that you’ve almost made it.
Protect your face with your arms, and run as fast as you can. Then, the horror will be over in two seconds!
While you can avoid quite a few wires in Electric Eel, they are far too close in Electroshock Therapy: Evasive maneuvers are futile.
Therefore, grit your teeth, get to it, and enjoy your beer afterwards! 🙂
| back to overview |
Everest 2.0

Faster, higher, stronger – that’s not only the Olympic motto but also the motto of Tough Mudder!
Everest 2.0 is impressive 20% steeper than his predecessor, and drives quite a few Mudders to desperation.
Most of the time, Everest 2.0 is the second to last obstacle, which means you’re already pretty worn out once you tackle it.
Still, you have to gather all the strength you’ve left, start sprinting, and run up a steep and slippery halfpipe.
It’s almost impossible to make the final part on your own. Try to grab the hand of another Mudder, so he can pull you up.
Only at a few other obstacles, Tough Mudder’s camaraderie proves is as important as at Everest 2.0.
Tips for the obstacle Everest 2.0
If you’re running as a team, let the Mudders with the greatest range go first. When trying to grab someone’s arm, every centimetre can make a difference!
Since the halfpipe can get quite slippery, go at it with long steps.
When running towards the halfpipe, sprint at it with speed. Give it all you’ve got, or you’ll fail. Every additional attempt requires an immense amount of energy!
| back to overview |
Fire in your Hole
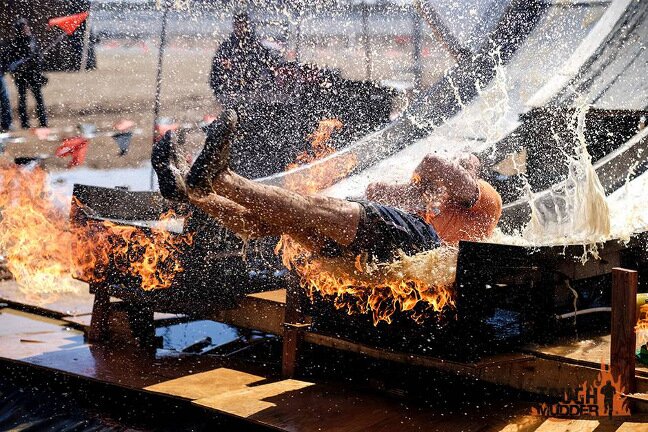
Another Legionaires-only obstacle. If you are about to take on your very first Tough Mudder don’t stress about it. If you’ve already earned your first headband, you’d better prepare yourself for Fire in your Hole!
This obstacle combines fun (who doesn’t love water slides?) with fear (not everyone loves to be shot through blazing fire).
You climb on top of a tall platform just to slide down an almost vertical water slide. On the bottom of the slide fire is waiting for you before you land in a pool of water.
Tips for the obstacle Fire in your Hole
We believe you’ve spend quite some time at your local public pool during your childhood and know how to slide down a water slide, or any other regular slide on a playground. Right?!
So not much to tell you here. It’s basically the same.
The only difference is the almost vertical drop and the fire at the bottom. Piece of cake, right?
Well, maybe we can still give you one or two advices to make sure you get down safely.
When you drop down cross your arms across your chest tuck your chin in, squeeze your buttcheeks together and go for it. Keep that body tension all the way down and you won’t bang your head or land uncontrollably in the water.
Scared of fire? Tough Mudder is about overcomeing fears. It’s more scary than the Fire Walker as you have no control when you slide down and also your hole body will actually pass the flames.
But remember you slide down a WATER slide and land in a pool of water a slpit second after shooting through the flames. For the ones who haven’t payed attention in chemistry: water extinguishes fire! 😉
This obsacle doesn’t test your fitness but your mental grit. Keep focused!
| back to overview |
Fire Walker

As the name implies, Fire Walker makes you run among pits of fire with easily up to 4 feet high flames.
Smoke will burn in your eyes and breathing will not be the most comfortable thing to do if the wind comes from the right direction.
If you think that is the worst part of the obstacle you’ll get a nice surprise at the end, where a fire pit is blocking your way. You have to take a leap of faith and jump over this pit to continue your way.
Don’t worry. You will jump into a pool of water so no reason to be scared. You won’t catch fire!
Tips for the obstacle Fire Walker
Well, we can definitely NOT recommend to train for this obstacle. So please… don’t try it at home!
Running through the first part of the obstacle, we advise to simply run through it at your normal pace. If the smoke is too heavy squeeze your eyes and take rather shallow breaths.
The heat is actually quite nice… especially when it’s cold and rainy or if you just took a plunge in the Arctic Enema 2.0. So no worries about the heat.
If you are scared of fires, don’t stress about it. Tough Mudder is about overcoming fears, the obstacle is safe. There is no real threat, it’s only in your head. So don’t overthink it.
If you feel like you start to panic just look around and make yourself realise, that everybody else gets through it safely as well, that there are plenty of fire fighters who will help imediately in case of an actual emergency (which, to our knowledge, has never happend) and remind yourself that behind the firepit you have to jump over lies a pool of water.
Also you will only be close to fire for a split second… no chance to catch fire!
Don’t approach the obstacle slowly or even slow down. Rather up your pace and jump, focusing on the water ahead, not on the fire.
| back to overview |
Funky Monkey 2.0
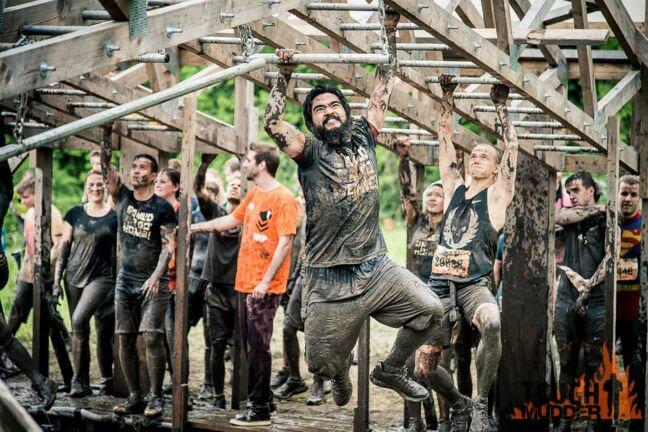
Funky Monkey 2.0 is so extremely challenging that only few Mudders master this obstacle.
The 2.0-version is, compared with his predecessor, much more varied and more difficult.
Apart from the already known ascending rungs in the beginning, you have to to switch to a trapeze in the middle, and then to a swinging descending tube in the end, too.
If you lose your power or grip, you’re falling unmercifully into the cold water below you 😀
One of the biggest problems is, that the rungs are exreme slippery because of the countless wet and muddy hands which went through this obstacle before you!
Tips for the obstacle Funky Monkey 2.0
Many Mudders lack the necessary grip strength in fingers and/or shoulders to master this obstacle. For better traction, wearing gloves can help you.
Steady movement is important for an economic technique.
Firstly, you should never hold onto the same rung with both hands, or you’ll lose momentum!
Swing yourself from rung to rung, and don’t waste too much time.
The bar in the middle is very tricky because it’s quite thick and therefore difficult to grip. In that case you should definitely use both hands, because otherwise the risk of slipping off is very high!
The tube in the end is also thick and swinging. Instead of crossing your hands, you should win distance with your hand in the front, and drag your second hand.
This way the risk of slipping off decreases dramatically.
General tips for your technique
Don’t hang there like a sack of potatoes!
Slightly lift your shoulders (draw shoulders in), and you’ll can get into a much more relaxed and controlled position.
Before you start your Tough Mudder, try to find a good position on a pull-up bar of your local keep-fit trail. You’ll get a feeling for the right position.
While attacking Funky Monkey 2.0, you can save the most energy by keeping your arms bent in a 90-degree angle.
Use your legs to generate momentum. You’ll need good coordination and well-developed core muscles for this, which makes this a more advanced technique.
Your best chance to conquer Funky Monkey 2.0 is to get into a rhythm and keep going!
| back to overview |
Hangin’ Tough

Hangin’ Tough is somewhat similar to Funky Monkey 2.0 and equally challenging.
According to their own statements, only 30 percent of all Mudders make it across Hangin’ Tough successfully. Based on our own judgment and experiences, this number seems to be pretty accurate.
If you want to stay dry during Hangin’ Tough, you need to swing from ring to ring until you make it to the other side of the water.
The rings are roughly 4-6 feet apart and pretty slick.
This means you need fewer swings to complete the obstacle than at Funky Monkey 2.0, but you need better coordination to stop your body from rotating too much.
Tips for the obstacle Hangin’ Tough
For significantly better grip, we highly recommend wearing gloves.
Grab the first ring with your weaker arm and work your way forward.
The smoother you move, the less you will rotate. Since stopping the rotation takes the most energy, try to move as smart as possible.
Never grab a ring with both hands, or you’ll have a tough time making it to the next ring.
To reach the next ring more easily, always keep your arms slightly bent. This way, you can take a lot of stress away from your shoulders and grip muscles.
To prepare for this obstacle, train at your local keep-fit trail and do pull-ups regularly.
You can also find more tips in our chapter on training tips or better – join the “Unleash the Mudder within you!” training program for free!
| back to overview |
Hero Walls
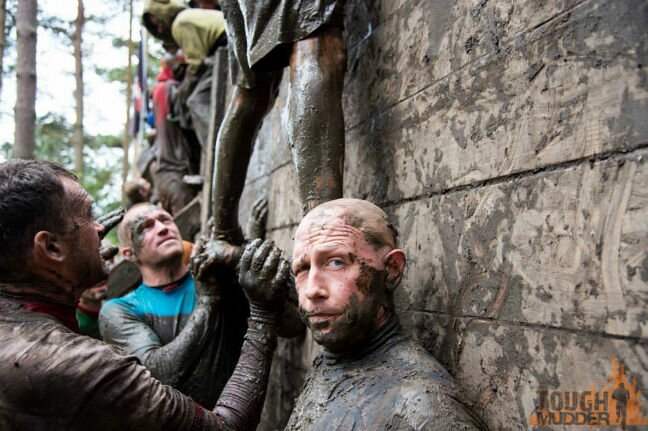
The Hero Walls are really tough. Only really tall or well-trained Mudders have a chance to master them without any help!
Here you have to conquer two 10-foot-high walls – without camaraderie impossible for 90% of the field.
In addition to that, the Hero Walls are usually in the last section of the course, which means you’re pretty spend when you attack it.
However, Mudders help each other, and nobody will be left behind!
Tips for the obstacle Hero Walls
When we strongly recommend you to do pull-ups during your preparation, the Hero Walls is one of the reasons why!
If you’re advanced, the only challenge is to get a hold on the top of the wall with your hands – then you can do a muscle-up, or just a pull-up and do the rest with your legs.
It’s only a matter of training!
But don’t worry, we also have some alternative techniques for you.
With teamwork to success!
Those who aren’t that strong, usually receive help with the classical leg-up.
But better than the leg-up is the double-leg-up!
That means two Mudders lean with their back on the wall, have their legs slightly bent for you to climb on to, so they can heave you up and if necessary even push you up all the way.
This technique is amazing, because you need only half the power, the third Mudder has much more space, and you can even push him over!
Usually, some Mudders are also waiting on the top of the wall to pull you up, so you have support from above and below 🙂
The last option is to climb on the wooden beam construction on the side of the wall.
Well, that’s kind of cheating though, but better than going around the obstacle.
| back to overview |
Hold your Wood

Hold you Wood explains itself. Grab a log and carry it along the course until you have to drop it on a pile again.
You usually walk in a circle until you come back to where you’ve started the obstacle so you take the log from the same pile you drop it off again.
This makes life easier for the volunteers, so they don’t have to hold their wood the whole day. Although we believe that Tough Mudder volunteers are tough enough to do so! 😉
The length of this obstacle can vary a lot from event to event.
Tips for the obstacle Hold your Wood
Most important… chose the right size of log.
One hint: As a guy… choosing a smaller log than your fellow female Mudders will turn your Hold your Wood into a walk of shame. So please… man up. You are a TOUGH Mudder afterall.
Choose a log which feels heavy when you pick it up but which you can still lift up easily enough to place it on your shoulder.
Here we are at how to carry the log best. Carry it on top of one shoulder. If it gets too heavy after a while change sides. Best by balancing it from one shoulder behind your neck to the other.
If you have a longer log it will be more comfortable to carry it across your neck and both shoulders.
Don’t hold your wood in front of you. That’s only a waste of energy you will need later on.
Your shoulder and neck muscles are stronger than the muscles in your arms. Also by carrying it across your shoulders, your whole body carries the weight and not just your arms.
As a team you can also choose to take on one of the really big logs and finish this obstacle together.
| back to overview |
Just the Tip
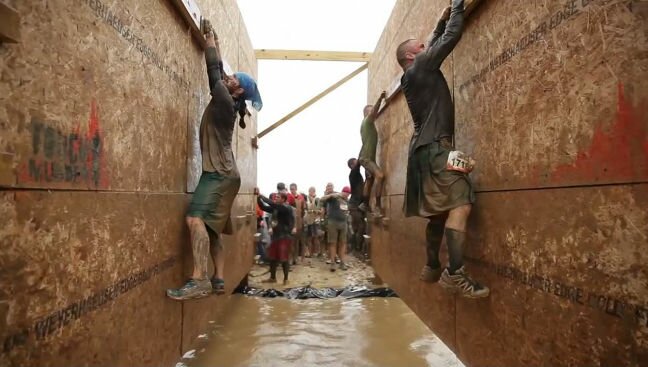
For Just the Tip you’ll need strength in your fingers!
With your hands you need to climb along a small wooden beam while hanging down, facing a wooden wall. Every few feet, there’s a small beam beneath you where you can place your feet and rest your fingers and arms.
Of course, advanced Mudders ignore these rest areas and conquer Just the Tip without a break!
Tips for the obstacle Just the Tip
Once again, we recommend wearing gloves. They’ll provide you with a better grip, and make sure you don’t get splinters.
Keep your arms bent at a 90-degree angle to use your strength efficiently. Try to gain as much distance with each stride as possible.
The longer you pause, the more your muscles will weaken. To avoid getting stuck in traffic jam, make sure to leave enough room between the Mudder in front of you and yourself.
| back to overview |
King of the Swingers
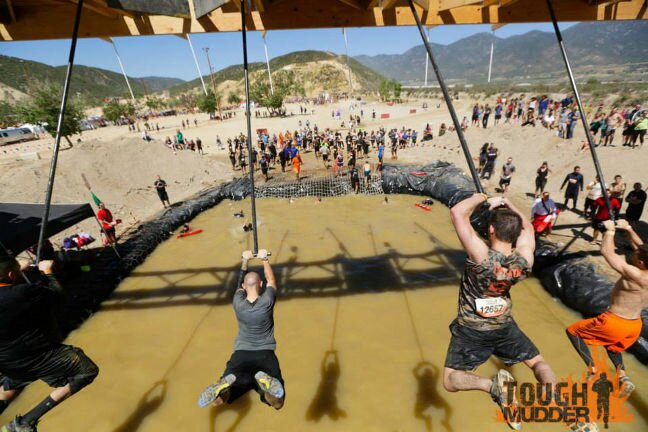
If you are a fan of waterslides, springboards and similar stuff, you will definitely love King of the Swingers! 🙂
Here you have to swing Tarzan like from a platform and try to reach a bell hanging quite a few feet in front of you over the water with your hands.
Only a few Mudders reach the bell, but nevertheles all Mudders get wet.
From the highest point it might be 9-12 feet from where you’re falling down into the water.
Tips for the obstacle King of the Swingers
Hanging on the bar and relying on your normal swing, thinking it will be enough definitively doesn’t work!
With this, you won’t even get close to that bell!
If you want to have a realistic chance, you have to jump with all your power, and keep all your muscles tense.
Let the bar go at the highest point, and stretch your preferred arm out as far as possible.
With good coordination skills and a bit of luck, you’ll be one of the few Mudders who passes King of the Swingers succesfully!
| back to overview |
Skidmarked

Not as hard as the Hero Walls, but still the walls of the obstacle Skidmarked are no piece of cake either.
The walls you have to climb over are not as high as the Berlin Walls, but they are at a 45 degree angle.
Due to your center of gravity, your feet automatically tend to move towards the direction of the wall, when trying to get over the edge by jumping up.
Of course, the goal is to conquer the Skidmarked alone, but in fact a lot of the Mudders need help.
Tips for the obstacle Skidmarked
If you follow our advice and do pull-ups regulary during your Tough Mudder training, you should be able to conquer the Skidmarked by yourself!
The secret lies in an explosive movement, because otherwise your feet will drop towards the wall, which makes it almost impossible to win back control.
Try to do a muscle-up as soon as possible or at least to throw one leg over the wall.
Of course, taller Mudders have an advantage, but with the right technique, strength, and body tension, even a midget is able to pass the Skidmarked successfully!
If you don’t have the necessary power, a leg-up or a double-leg-up, as described in the Hero Walls section, should be the first choice.
If all else fails, then you can climb on the wooden beam construction on the side of the wall – but please, you’re a Mudder! So only do this in a case of emergency!
| back to overview |
The Liberator

At The Liberator you have to climb over a diagonal wall with the help of two wooden sticks.
The wooden sticks fit exactly in the holes of the wall, so you have to make distance primarily with your back and arm strength!
Depending on the course, the obstacle might differ. Sometimes your feet can support you more and sometimes less.
Most of the times they have two different kinds of lanes – a normal one with small wooden beams as assistance for your feet and one for advanced Mudders without any assistance.
So you can choose!
Tips for the obstacle The Liberator
If you follow our Tough Mudder training tips, and regularly do pull-ups, then The Liberator isn’t that big of a deal for you, because you can rely on your back and arm strength!
Press your body close to the wall, do a pull-up with the help of the sticks, and then work your way up to the top hole by hole.
You can try to support yourself a bit with your toes, but then you automatically create a distance between your hips and the wall.
In that case, the risk of slipping out of a hole and sliding down increase significantly!
If you don’t have enough power, don’t worry!
There will be Mudders who are holding and pushing your feet from below and others on top trying to reach your arms to pull you up – so nothing can go wrong.
| back to overview |
Trench Warfare
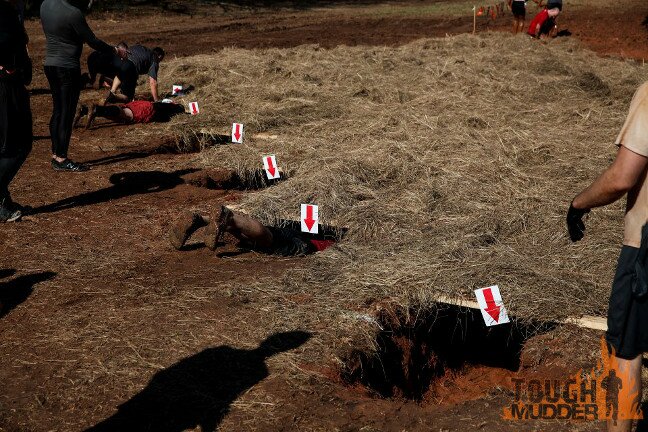
At the obstacle Trench Warfare you have to crawl through a dark, narrow and curvy tunnel which was dug into the ground.
You crawl through dirt, little stones and sticks might leave you with a few scratches on your knees and arms.
If you are not comfortable with tight spaces, the fact that it’s pitch black because you can’t see the end of the tunnel, doesn’t make it easier.
Tips for the obstacle Trench Warfare
There is usually enough space to get on all fours and crawl through it.
As you can’t see much, you shouldn’t rush or you might run into a wall because you missed a turn. So just take it easy.
After a little while your eyes will adjust a little and you will be able to see some outlines. Orientate yourself on the Mudder in front of you and you’ll get through this obstacle more easily.
If you are scared of tight spaces, staying close behind the Mudder in front and talking to your team mates inside of the tunnel while making your way through will help you to calm down.
| back to overview |
Twinkle Toes
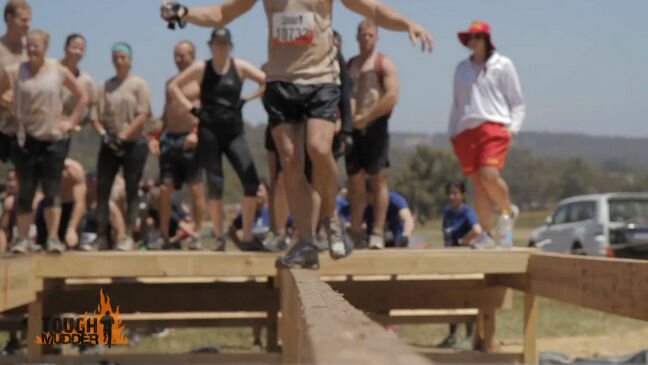
If you hated the balance beam in school, Twinkle Toes will hardly create any enthusiasm in you either.
To avoid (another) cold surprise, you have to make it across a narrow wooden plank with about the width of your foot.
Since you’re a real Mudder, you’ll face this challenge straight up and not crawling or sitting down!
Tips for the obstacle Twinkle Toes
Surely you know the feeling of having to overtake a truck in a narrow construction area on the highway.
The more you think about how close a call this is, the worse you’ll feel. If you don’t think about it, however, you’ll pass by the truck smoothly and relaxed.
Twinkle Toes is very similar.
Don’t try to run across the plank and don’t crawl on your knees. Take normal steps at a medium pace, and you’ll have the best chance to make it across dryly.
Try to walk as upright as possible and focus your eyes on the other end of the plank. To avoid having to stop in the middle of the plank, make sure to leave enough room between the Mudder in front of you and yourself.
| back to overview |
Walk the Plank
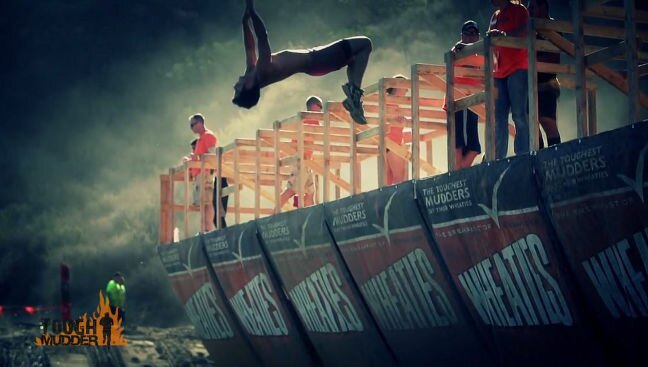
Whether you’ll enjoy Walk the Plank or not largely depends on your attitude towards water and heights. For many, this is one of the most fun obstacles.
For others, the sheer thought causes massive panic: You have to jump into the water from 3-4 metres high platform and swim to the other side.
At Walk the Plank, you can witness everything from a scared plunge to a backflip with a twist.
Tips for the obstacle Walk the Plank
If Walk the Plank should scare you, try jumping from the diving board in a public swimming pool. At Tough Mudder, you have to master this obstacle anyway.
If you hesitate, other Mudders will show no mercy and push you in. Therefore, grit your teeth, and get to it!
To make sure you dry quickly, we recommend special gear and running shoes that are well suited for Tough Mudder.
| back to overview |


